
This guide reviews how to set up a cable wireless router securely. If you have a basic router without wireless capability just ignore Step 5 which relates to wireless only.
A Cable Wireless Router is one that connects to a broadband Cable Modem. If you have ADSL broadband (via a phone line) then see how to set up an ADSL wireless router.
When setting up a wireless router you must initially use an ethernet cable to connect it to your computer in order to set up the router and configure it for wireless access.
Once completed, you can remove the ethernet cable from your computer and connect via the new wireless network.
Step 1
If connecting the router to an existing cable modem, plug in a standard ethernet lead from the ethernet (sometimes called 10/100/1000) socket of the modem to the WAN/Internet/Uplink socket of the router – this is often a 5th socket, separate to the other (usually 4) ethernet socket(s).
Now connect a standard ethernet lead from one of the other ethernet/LAN sockets on the router to the ethernet socket on your computer. Switch on the cable modem and jump to Step 3.
Step 2
If connecting the router directly to your Internet coaxial lead/cable, connect the cable to the Cable/coaxial socket on the router and then connect a standard ethernet lead from an ethernet/LAN socket to the ethernet socket on your computer.
Step 3
Connect the router to the mains power and, if it has an on/off button, switch it on. Wait a minute for the router to switch on fully and then you are ready to configure the router.
You first need to know its IP address – look in the instruction manual or see how to find the IP address of a router.
Open your web browser and log in to your router configuration pages using its IP address and username/password or see how to access router configuration pages.
Every router has a different set of configuration pages and unfortunately the menu options may be called different names but the ones we are most interested in are likely to be called:
- Internet (or WAN or Connection Setup) – to set up Internet access
- Wireless LAN (or wireless) – to set up a wireless network and security
- Password (or admin settings) – to change the router password you just used to access these configuration pages.
- Firewall – to configure additional security
In my case below they are called WAN, Wireless LAN, Password and Firewall.
Step 4
You need to check the Internet (WAN/connection setup) connection settings first – the settings may be specific to your cable provider but you may not have to change anything and your internet will work just fine. Check with your cable broadband provider for any specific settings required.
In particular, you should usually select the option to ‘Obtain an IP Address Automatically’ rather than use a ‘Static IP Address’ and if there is an option for ‘Nailed Up Connection’ (or Permanent Connection) select that rather than ‘Connect on demand’.
Finally, if you have a Max Idle Timeout option (or similar) it should be set to 0 (zero) seconds to keep your internet connected permanently. Save or Apply any changes.
Step 5
Now set up the Wireless network and security. Selecting the Wireless LAN (or similar) menu option should bring up a screen to choose wireless settings – mine is shown below:
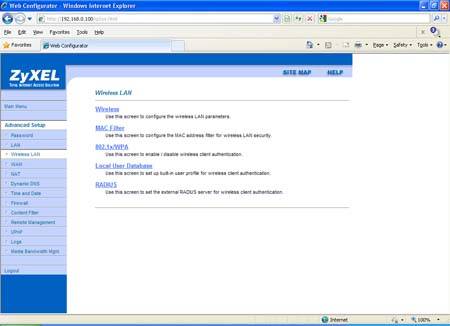
In my case we need to access the Wireless and the 802.1x/WPA options (may just be called Security) which are on different sections of the menu – yours may all be in one section under a heading like ‘Wireless’ or ‘Wireless Network’.
Wireless network – Our wireless menu brings up the following screen:

If there is an option to Enable Wireless LAN, enable it to switch wireless access on. Now we need to give our wireless network a name – the name of the wireless network may be described by your router menu as wireless network (name) or ESSID or SSID.
In mine it is ESSID and I have given it a name of ‘testnetwork’. Do not choose your own name or a house number which can identify your location – use a general name like homenet178.
If there is an option, choose NOT to hide the ESSID/SSID/network name or else you will not be able to see your wireless network from a wireless computer to connect easily to it – in my example I have ticked the box not to hide it.
Now choose the channel (ID/frequency) which is the particular wireless channel your network will use – some routers are set to Auto (to automatically scan all channels and choose the ‘best’ one).
In my experience, Automatic channel scanning does not always work well so choose a channel of 1, 6 or 11 (avoiding other channels as they may overlap/interfere with the wireless signal). Save or Apply any changes.
Wireless Security – Now we need to set up wireless security – may be called 802.1x/WPA as shown below:

On my router I have chosen ‘Identification Required’ to ensure a password is needed to access the wireless network. I have chosen WPA2 for the Key Management Protocol (may be called Security Type) which is the best level of security currently available – highly recommended.
Older security options are WPA (can be hacked into), WEP (very poor and easy to hack into) and Open (no security at all – anyone within range could access your WiFi network and use your internet).
Your router may also have a WPA/WPA2 mixed mode as one of the security options or it may be a separate option (WPA mixed mode). This allows the router to use either WPA or WPA2 depending on the computer trying to access it.
This is good for compatibility with very old computers that cannot use WPA2 but is not recommended because WPA is not secure. Unless you have a really old wireless device (which you should really update now) choose WPA2 only, not mixed mode.
Now type in a password for the wireless network in the Pre-Shared Key (may be called Password). Choose a strong password (minimum 10 characters, a mix of upper and lower case, numbers and special characters like the * sign) to ensure nobody else can guess it or hack into your network.
Remember this wireless network name and password as you will need them in future if you want to set up wireless access for a phone etc. Save or Apply any changes.
Step 6
Now select the firewall menu (not all routers will have this – if not available skip to Step 7). There are many advanced options for firewalls – you can use the standard settings but if there is an option for firewall ‘On’ or ‘Off’ make sure you set it to ‘On’.
Step 7
Finally, change the admin password needed to access these router configuration pages in future – this is highly recommended as otherwise viruses and hackers could easily guess the password and make unauthorized changes to your router.
It is often found in the Admin Settings or Password section of the router menu as shown below:

Here you can enter the old router password that you used in Step 3 to access these configuration pages, then enter a new password (usually twice to confirm it) and apply/save the settings. Try to use a password of at least 8 characters.
Important: Do not forget this new password or you will not be able to access the router configuration pages in future without resetting the router back to factory settings and setting it all up again!
The router will ask you to confirm and may log you out of the router configuration pages – to get back into the configuration pages in future you would need to go back to Step 3 and enter your new router password.
Now your cable wireless router should be configured for internet use and secure wireless networking.


